Waking up with naturally defined and well-shaped brows feels like the ultimate beauty shortcut. With the right at-home tinting technique, your brows can hold color for 3 to 6 weeks. The key is applying the tint carefully and with control, so they enhance your features without appearing too harsh. This step-by-step guide shows how to tint your brows neatly and safely without making a mess in your bathroom.
Why Home Brow Tinting Is Worth It
DIY brow tinting isn’t just about skipping salon visits—it’s about cost savings and control. A single tint kit often lasts for multiple sessions, unlike professional appointments that cover only one. When you tint your brows yourself, you decide on the shade intensity, front gradient, and final shape. The tint on the hair typically stays for 3–6 weeks, while any stain on the skin fades after 5–7 days, giving a softer fade. You can easily tweak the shade or timing based on seasonal makeup changes or hair color updates. This flexibility brings a polished, effortless look—even on makeup-free days.
How Long Does Eyebrow Tint Really Last?
The durability of your brow tint depends on skin type, skincare habits, and product use. Hair holds onto pigment longer than skin, which is why brows fade gently rather than disappear. Treat your freshly tinted brows with care—avoid excess heat, friction, or strong cleansers—to prolong the results.

| Factor | What You’ll Usually See |
|---|---|
| Dry or normal skin with gentle cleansing | Defined color for 3–6 weeks; skin stain fades in about a week |
| Oily skin, frequent swimming, or strong sun exposure | Noticeable fading after 2–3 weeks |
| Heavy oils, balms, or exfoliants near brows | Color fades faster, especially from the skin |
Tools You’ll Need Before Tinting
You don’t need professional tools, but having the right items ensures safe, even application:

- Brow tint or gel (ammonia-free)
- Developer recommended by the brand
- Plastic or glass mixing bowl & spatula
- Angled brow brush or precision brush
- Cotton pads and swabs
- Petroleum jelly or thick face cream (barrier)
- Gloves & clean spoolie
- Micellar water or gentle toner
- Phone timer or stopwatch
Never use regular hair dye on your brows—some ingredients like PPD (p-phenylenediamine) are too harsh for delicate eye-area skin and can cause serious reactions.
Why Patch Testing Is Essential
Always perform a patch test before tinting. Apply a small amount of mixed product behind your ear or inside your elbow. Leave it uncovered for 48 to 72 hours. If you see any redness, swelling, itching, or blistering, don’t use the dye. This simple step can prevent serious reactions near your eyes.
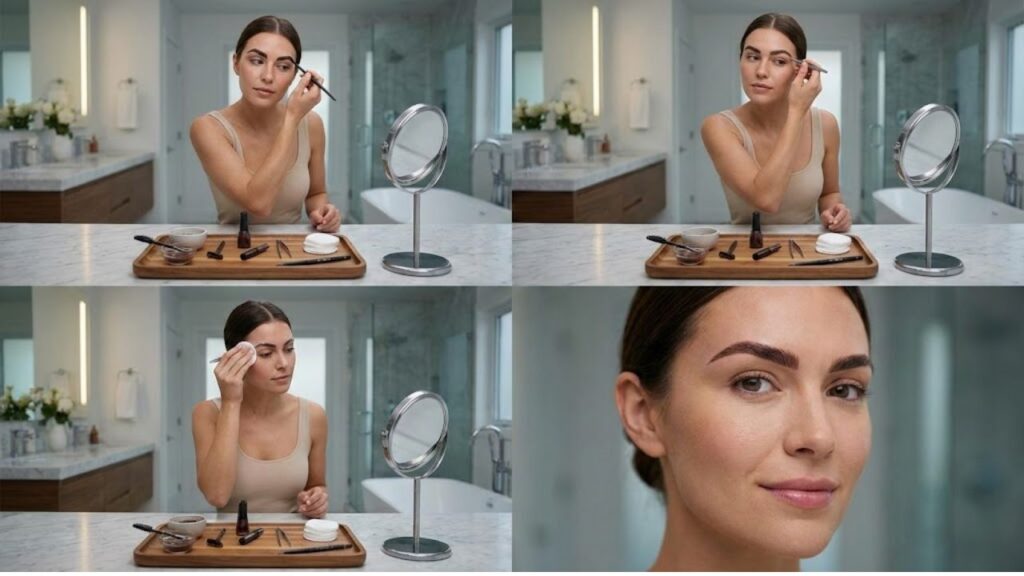
7 Simple Steps to Salon-Like Brows at Home
1. Shape Brows One Day Ahead
Tweeze any stray hairs that clearly fall above, below, or between your brows. Don’t over-pluck the main brow shape. Lightly outline your desired shape with a pencil, then use micellar water to clean the area and remove any oil for smoother tint application.
2. Protect the Surrounding Skin
Apply a thin layer of petroleum jelly or thick cream along your brow outline—without touching the hairs. This barrier prevents staining outside the brow area and helps define sharp, clean edges.

3. Mix the Tint Properly
Combine around 0.5 to 0.75 inch of tint with an equal amount of developer (or as directed). Stir until the mixture is smooth and lump-free. Choose a shade 1–2 tones darker than your natural brow color for the best results—avoid overly dark or mismatched tones.
4. Apply to the Fullest Area First
Begin at the inner brow (closest to your nose) and use short, hair-like strokes in the direction of hair growth. Use less product as you move outward. If you have light or gray hairs, ensure they are fully coated for even coverage.
5. Time It Carefully
Follow the brand’s recommended processing time (usually 7–15 minutes). At the 3–5 minute mark, gently comb through the inner brow with a clean spoolie. This softens the front area and avoids a boxy look.
6. Remove Gently and Condition
Once time is up, wipe off the tint using damp cotton pads. Be gentle—no scrubbing—to avoid irritating the skin or damaging brow hairs. Follow up with a conditioning serum if your product includes one.
7. Check in Daylight & Start Aftercare
Wait about an hour, then check your brows in natural light. Minor asymmetry is normal and can be corrected with makeup. Keep brows dry for the first 24 hours and avoid exfoliants or oil-based products for several days to help the color last.

Common Brow Tinting Mistakes to Avoid
- Skipping the patch test—can lead to allergic reactions
- Choosing a shade that’s too dark—can look artificial or harsh
- Scrubbing during removal—can irritate skin and damage hairs
- Neglecting aftercare—causes early fading from heat or cleansing products
Tinting Brows at Home Is a Game-Changer
When done right, a brow tint can elevate your entire appearance. It frames your eyes, refreshes your complexion, and gives you a groomed look—even on no-makeup days. With the right tools, safety steps, and post-care, you can achieve long-lasting, natural-looking brows from the comfort of your home. Once you master your routine, it will become a beauty essential you’ll rely on every few weeks.