The radiator clicked on with its familiar metallic hum, the sound that usually promised comfort. Outside, the wind rattled bare branches and tapped against the windows, a soft reminder that colder days were settling in. Indoors, the temperature was fine, yet the air felt dry, thin, and uncomfortable. Your throat scratched slightly, your hands felt tight, and your nose hovered on the edge of a sneeze. Somewhere in the back of your mind, you recalled an old suggestion—maybe from a relative, maybe from something you once read—about placing a glass of water near a heater. It sounded outdated, almost like folklore. Still, as the dryness worsened, you filled a glass and set it beside the radiator. Slowly, without drama, the room began to feel different. The change was subtle, the kind winter brings quietly, without asking permission.
The Unexpected Comfort of a Simple Glass of Water
It may seem surprising, but a plain glass of water placed near a heat source can make a room feel noticeably more comfortable without raising the temperature. Water itself doesn’t generate heat, but it supports your body’s ability to stay warm by improving air moisture levels. Radiators and heaters often strip moisture from the air, creating dryness that creeps in unnoticed until signs like itchy skin or static electricity appear. What’s easy to miss is how much this dryness changes your perception of warmth.
How Dry Air Tricks Your Body Into Feeling Colder
Your body is constantly exchanging heat with the surrounding environment. When humidity is low, moisture evaporates faster from your skin and breath, pulling heat away in the process. This creates a subtle cooling effect, even if the room is technically warm. By placing a glass of water near a radiator or heater, moisture slowly returns to the air through gentle evaporation. This helps reduce moisture loss from your body, allowing you to feel warmer and more comfortable without touching the thermostat.

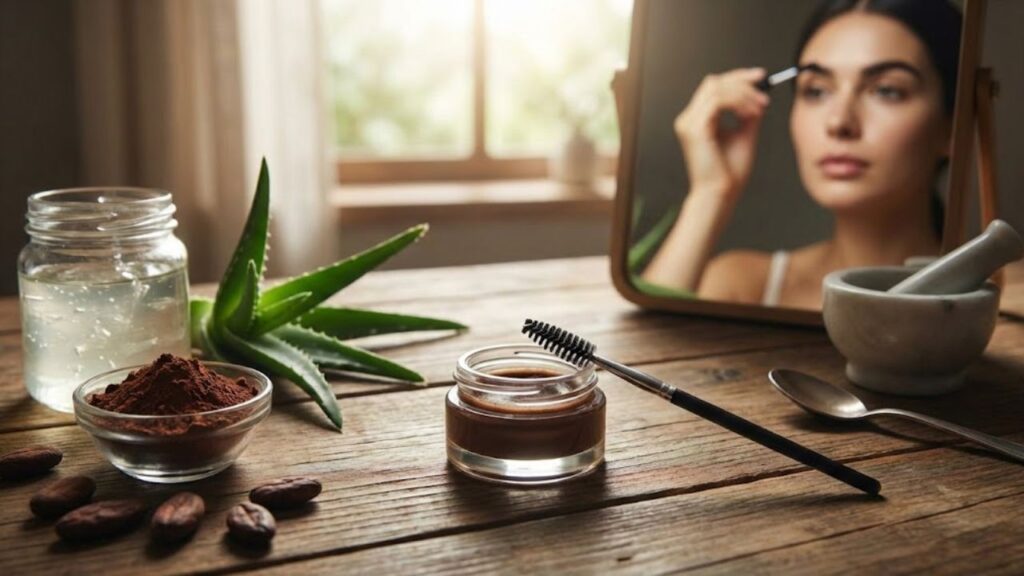
Aloe Vera as a Gentle Solution for Brow Control
Known for its calming and soothing qualities, pure aloe vera offers a soft, effective way to manage eyebrows. It feels light, cool, and never leaves brows stiff or crunchy. As a natural base for a DIY brow gel, aloe provides light to medium hold, keeping hairs in place while allowing flexibility. When you choose a high-quality aloe gel without harsh additives, it also hydrates the skin beneath, turning everyday brow grooming into a nourishing habit rather than a quick fix.

Cocoa Powder for Natural Brow Tinting
Unsweetened cocoa powder is rich in natural pigments, making it a surprisingly effective option for adding warmth and depth to brow gel. It works especially well for light to medium hair tones, offering a soft tint that enhances brows without overpowering them. When combined with aloe, cocoa creates a smooth blend that defines without harsh edges. By adjusting the amount used, you can control the intensity, achieving a customized shade using a trusted kitchen ingredient.
How to Make a Simple DIY Brow Gel at Home
Creating your own brow gel can feel calming and intentional. With just a handful of basic supplies, you can make a product that’s both effective and naturally derived.

- Aloe vera gel (2 tsp): Adds hydration, hold, and a smooth base
- Cocoa powder (¼–½ tsp): Provides natural color and warmth
- Clean glass jar: Keeps the mixture safe and reusable
- Spoolie or angled brush: Helps shape and distribute the gel evenly
- Small spoon or stir stick: Ensures a smooth, lump-free mix
Mixing Your Brow Gel Smoothly and Evenly
Start by adding two teaspoons of aloe vera gel into a clean, sanitized jar. Sprinkle in one-quarter teaspoon of cocoa powder and stir slowly, breaking up any clumps. The mixture should form a soft brown cream. Test the color on your hand and adjust as needed—add more cocoa for depth or more aloe for a lighter finish. Once the texture is smooth and even, close the jar and let it sit for about an hour so the blend can fully settle.
Applying Your Homemade Brow Gel for Best Results
Begin with clean, dry brows. Lightly dip a spoolie into the gel, removing any excess before application. Use short, gentle strokes following the natural direction of hair growth, starting at the inner brow. For added definition, allow the first layer to dry before applying a second, focusing on sparse areas. An angled brush can help create fine, hair-like lines. The final effect is soft, natural, and flexible, with hold that never feels stiff.

Minimal Beauty, Mindful Care, and Brow Simplicity
Making your own brow product reflects a return to simple, thoughtful routines. It reduces waste, avoids unnecessary additives, and reconnects you with the process of creation. Each use replaces a store-bought tube and reinforces the idea that effective care doesn’t need to be complicated. Natural blends reward patience—patch testing is wise, and small adjustments make the formula uniquely yours. In that quiet moment, brush in hand and cocoa nearby, you’re reminded that self-care can be gentle, personal, and sustainable.
